Composting made easy
Composting is one of the most beneficial activities for the homestead. Plants grow better and provide a more substantial harvest with home compost. It also cuts down on food scraps waste and yard waste, etc. I’m going to make it easy for you to understand hot to compost.
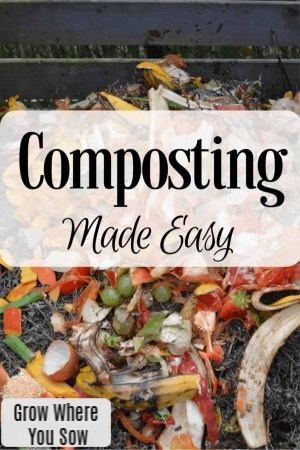
Table of contents
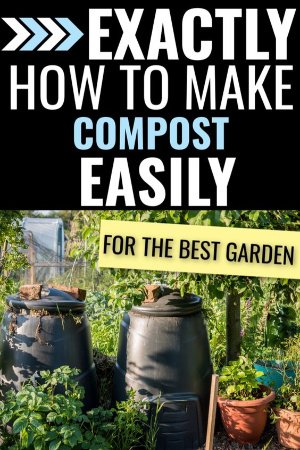
How to make compost easy while understanding the method choices and benefits.
Even some HOA’s allow compost bins/piles. Did you know you can re-purpose 20-50% of your kitchen waste and food scraps through composting? If you’re looking for the ‘composting for beginners’ guide, you’ve found it.
What is compost?
Well, according to Google:
com·post
ˈkämˌpōst/
noun
- 1. decayed organic material used as a plant fertilizer.
According to me:
GOLD. The most fun DIY project you’ll ever find! A perfect excuse to be outside. A way to give back to this beautiful planet we live on and reduce waste. Do you need any better reasons? Because I bet I could come up with more.
Why I love it
My relationship with compost started long before I owned a homestead. I’ll admit, it wasn’t always a great relationship. It was one of those relationships where I thought I was giving 100% and Mr.Compost was only giving like 35%.
It turned out that I wasn’t being that good of a partner and I was not giving 100%. The good news was that it was an easy fix once I read up on it, and now my relationship is hot, hot, hot.
Composting methods
I can’t put into words how excited I was when I pulled the stick out of my compost and it was hot to the touch. Just imagine the look on my face when I turn my compost on a chilly morning and it steams. I was so excited for the finished compost to be added to the garden beds.
We won’t cover all the different methods of composting, but I’ll tell you a bit about my composting history. I started from the bottom, now I’m here.
Cold composting
When I first started composting, I was unintentionally cold composting. I didn’t know I was cold composting, but I knew my pile wasn’t getting hot and that made me hot!
I’d get so frustrated. Throughout the beginning of my composting journey, I thought the only way to compost was to have a hot pile. That just turned out to be false. I also didn’t know about nitrogen and carbon-rich materials.
Cold composting is when you throw everything in a pile. The pile will sit for a year or two until everything decomposes. Cold Compost = Slow Compost. Make sure you don’t put diseased plants or weed seeds in your cold compost pile.
Since your pile won’t be heating up, they won’t be killed off. This is a fine, low-involvement method if you’re in no rush to use that beautiful, rich humus. It is still a wonderful way to repurpose your kitchen scraps.
Vermicomposting
Vermicomposting is composting with worms. What?! Worms?! Yep, you got it. Worms are a part of the composting cycle no matter what method you use (except for the bokashi method). The vermicomposting method just utilizes a crucial part of the natural cycle.
When Emerson and I moved into our house we ordered some red wigglers and set up our DIY vermicomposting bin. It was so exciting to think these worms were going to turn our scraps into the soil.
Unfortunately, we had no idea what we were doing and all our worms died. We didn’t keep them moist and fed enough, mainly because all our scraps were going to our main compost pile. They were put in the back of a closet and forgotten, and I definitely don’t recommend doing that.
I look forward to vermicomposting again one day, not for the soil, but for the vermicompost tea. This method of composting is for you if you don’t need to produce large amounts of soil. It can also be an educational and eco-friendly project to do with your children!
If you’ve been looking for a great, organic fertilizer for your plants you’re in luck. You can find DIY setups that fit under your sink or buy a stackable compost bin to put in your garage, laundry room, etc.
Note, red wigglers do require a small amount of care and have min/max temperature requirements. Please be informed before investing money into your wiggling friends.
Hot composting
The method I’m currently using and will continue to use for the rest of my life. Hot composting is when the microbial activity within the compost pile is at its optimum level. Materials start decomposing within your pile at a faster rate, resulting in soil sooner. Achieving a hot compost pile will speed up the composting process.
You can add diseased plants and weed seeds to your hot compost pile as long as your pile is heating up to 120º – 170º. There are five major factors to hot composting; let’s make like our compost pile and break it down.
- LOCATION
You want your pile far enough from your house so you don’t attract unwelcomed guests (raccoons, rodents, the neighbors’ hound dog). Odors when you’re first starting out are also possible. You want it close enough to the house that you don’t have to break your back lugging your scrap bucket to the farthest point of your yard.
Position your pile on higher ground to prevent any kind of flooding from hard rains. Last, place your pile in a sunny spot. My compost bin is near the majority of my gardens for easy transportation. - C : N RATIO
The C: N ratio when composting is 30 parts carbon (browns) to 1 part nitrogen (greens). Now, you can drive yourself nearly nuts if you try to obsess over this ratio. I know because I did. I would ask myself “Will I ever be able to do this!? How the heck do I know if my pile is the right ratio?”.
Well, the first answer is YES, you will definitely be able to do this, and the second answer is heat. That was far too vague and confusing for me as a beginner, so here’s what I did and still do:
I slowly fill up a 5-gallon bucket with my scraps from the kitchen (green material). Every time I empty my bucket on my pile I then fill the empty bucket up with leaves or dead straw (brown material) 3-4 times and empty it on my compost pile, too.
I understand this math doesn’t make sense, but when I started doing this my compost pile got hot for the first time ever. Now every time I empty a bucket I make a small indentation in the center of my pile, add my greens, and cover it with my browns. - MOISTURE
Just as your healthy microbes need food to “eat,” they also need water. Your pile should be moist like a squeezed sponge. If you live in a consistently rainy area, you shouldn’t have to add water to your pile.
I keep my compost covered with a tarp so I have full control over the moisture level of the pile. Every time I add compostable materials, which is a few times a month, I lightly water everything in. Once my fresh brown material looks evenly damp I stop watering.
The only time I ever water my pile between sessions of adding material is if I pull my “heat stick” out and it’s completely dry. If the end of the stick is nicely moist, I leave it be. - AERATION
Some people don’t believe you need to turn your pile and others swear by it. I’m going to preach to TURN IT UP Y’ALL! Every time I add my browns and greens, I turn my pile.
First I turn my pile and then I add my new materials. Your microbes need food, they need water, and, so help me, Hannah, they need air. Turning your pile assures that any material your undercover, microscopic workers haven’t yet found will be turned into the pile for closer reach. - SIZE
The four points we just went over mean nothing if your pile isn’t large enough. I know, I know – Are you kidding me? No kidding here, only compost. Your pile has to be at least 3 ft x 3 ft. Some people swear by a minimum of 4 ft x 4 ft!
My pile is the latter and heats up wonderfully. It’s the perfect size for me to be able to stick a pitchfork in and turn it every now and then.
Materials for your composting pile
Carbon-rich materials (browns)
- Dried Leaves/Foliage in General
- Newspaper Clippings (Shredded)
- Cardboard (Shredded)
- Paper (No Gloss!)
- Aged Hay (My favorite)
- Chipped Wood
- Dried Grass
- Straw
- Wood Ash
- Coffee Filters
- Peat Moss
- Pine Needles (Shredded)
- Sawdust (Only from untreated wood)
- Paper Towels (Preferably not bleached)
Nitrogen-rich materials (greens)
- Vegetable and Fruit Scraps (Minimal citrus)
- Coffee Grounds
- Tea Grounds
- Manure from Herbivores (Horse, cow, goat, rabbit!)
- Weeds (Remember, only weed seeds if HOT)
- Plant Prunings
- Fresh Grass Clippings
- Old Flowers
- Feathers (From culling your livestock)
- Egg Shells
What not to add to your compost pile
- Meat and Dairy
- Cat, Dog, and Human Manure
- Glossy or Coated Paper
- Synthetic Fertilizer
- Large, Bulky Material
The bottom line when composting
If you’re still here then congratulations to you! You’re ready to make it hot. Composting can be very intimidating and I’ll be the first to admit that I have a very long way to go. I plan to attempt every method of composting there is before I leave this sweet Earth.
My newest endeavor is deep litter composting. This method requires chicken manure and you can read a great post about it here. I’m on day 6 of this method and I hope that day 18 is just as great if I follow the directions!
Pro tips:
- An easy way to remember that the “browns” are carbon-rich materials is that they both have a “B”.
- Can you guess what I’m going to say to remember that nitrogen-rich materials are “greens”? Yep, the “G”! Good job!
- Meat and dairy will attract scavengers to your pile and we don’t want that.
- Large, bulky items will slow your compost pile down. If you add a bag of shredded newspaper in one spot on your pile, it’ll become compacted over time, making it hard for your microbes to work and even harder to turn your pile. I know this from experience.
We have a big compost pile which we turn over with the forks on the tractor. Plus I do trench composting which is super easy. Found you on Simple Homestead Blog Hop.
I’ve read about your trench composting and can’t wait to try it! Thanks for participating in the Simple Homestead Blog Hop, Candy!